How to Drain Down a Central Heating System (and When You Need To)
Draining down a central heating system is one of those jobs that sounds simple until you are standing over a drain-off point with a hose that will not seal. Here is when you actually need to do it, how to work through it methodically, and where the real risks sit.
Draining down a central heating system means emptying the water out of the pipework, radiators and boiler so that you can work on part of the system without flooding the house. It is a job that comes up more often than most homeowners expect, and it is one of those tasks that reads as straightforward on paper but has a handful of steps where a small mistake turns into a wet carpet, a stuck radiator valve, or a boiler that will not refill cleanly afterwards.
This guide walks through the whole process in the order a careful person would actually do it: understanding when a drain down is genuinely needed, preparing the system, finding and using the drain-off point, emptying the system properly, and then the part people rush and regret, which is refilling, re-pressurising and bleeding the air back out. We will also be honest about where the DIY line sits, because some of this you can reasonably do yourself in a London flat or terrace, and some of it should stay with a qualified engineer.
When do you actually need to drain down a central heating system?
The first thing worth saying is that you do not need to drain the whole system nearly as often as people think. A full drain down is disruptive, it introduces fresh oxygenated water that can encourage corrosion if the inhibitor is not topped up, and it always carries a small risk of disturbing an old valve or joint that was quietly holding on. So the honest starting point is: only drain down when the job in front of you genuinely requires it.
Here are the situations where a drain down, or at least a partial one, is the right call:
- Replacing or moving a radiator. If you are swapping a radiator for a different size, or taking it off the wall for decorating, you can often isolate that single radiator at its valves and avoid draining the whole system. A full drain down is only needed if the radiator cannot be isolated, or if you are working on the pipework feeding it.
- Repairing a leak on the pipework. Any leak on the fixed pipework, a soldered joint, a compression fitting or a section of pipe under the floor, usually needs the affected circuit drained so you can cut, clean and remake the joint dry.
- Replacing a valve. Radiator valves, lockshields, and particularly system components such as a zone valve or a pump, need the water out of that section before you can undo them without a flood.
- Adding to or altering the system. Extending pipework for a new radiator, or moving a boiler, means opening the system, which means draining it.
- A power flush or a system that needs cleaning. Heavily sludged systems are sometimes drained as part of a clean, although a proper power flush is a different, machine-driven process.
If your problem is simply that the boiler pressure keeps dropping, draining down is almost never the answer, and doing it can make diagnosis harder. That is a pressure or leak issue in its own right, and our guide on how to repressurise a boiler covers the far more common fix. Likewise, if you suspect water is escaping somewhere you cannot see, tracing it first with central heating leak detection in London is a better use of your time than emptying a system that may not need it.
Sealed system or open-vented? It changes the job
Before you touch anything, work out which kind of system you have, because the drain down and especially the refill differ.
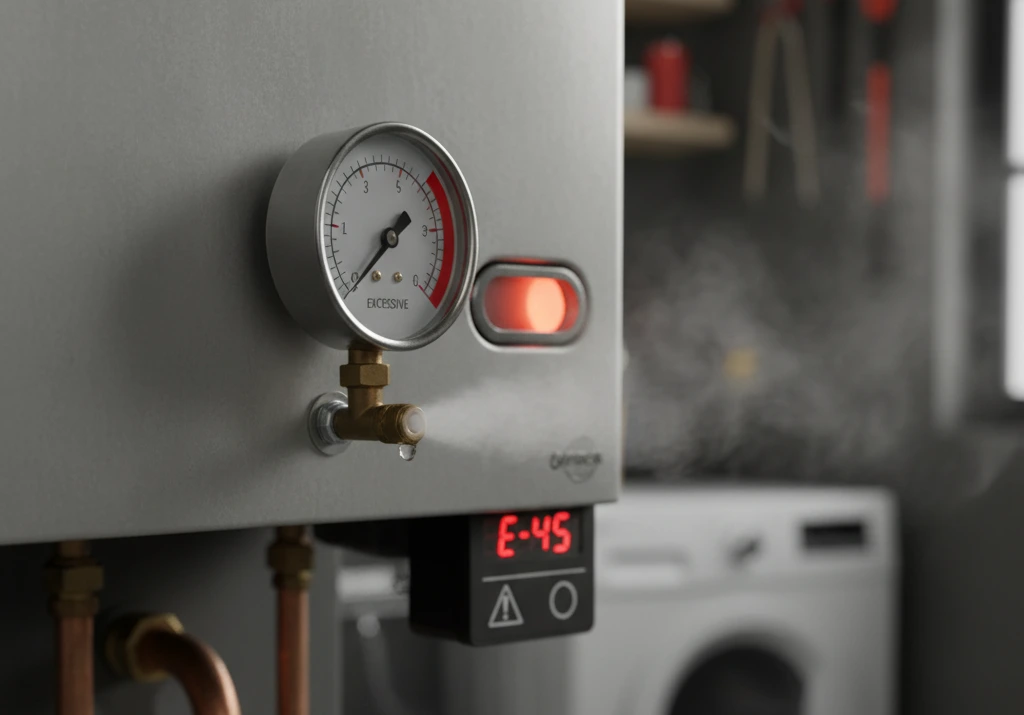
A sealed (pressurised) system is the most common in modern London homes with a combi or system boiler. It has a pressure gauge on the boiler, a filling loop (a short braided hose with valves), and no tank in the loft feeding the heating. You refill this type by hand using the filling loop and watch the gauge.
An open-vented system has a small feed-and-expansion tank in the loft, usually alongside the larger cold water storage tank. It tops itself up automatically from that tank. These are common in older properties and refill differently: you tie up or isolate the float valve in the tank while draining, then release it to refill.
| Feature | Sealed / pressurised system | Open-vented system |
|---|---|---|
| Pressure gauge on boiler | Yes | No |
| Filling loop | Yes, braided hose with valves | No |
| Loft tank feeding heating | No | Yes, small feed-and-expansion tank |
| Refill method | Filling loop, watch gauge to 1.0 to 1.5 bar | Release float valve, tank fills by gravity |
| Typical age of property | Newer or upgraded | Older, unmodified |
What you will need before you start
Preparation is where most of the frustration is avoided. Gather everything before you open a single valve, because once water is moving you do not want to be hunting for a jubilee clip.
- A garden hose long enough to reach from the drain-off point to an outside drain or gully, ideally with a jubilee clip to secure it.
- A radiator bleed key.
- An adjustable spanner and a set of open-ended spanners.
- Old towels and a shallow container or two to catch dribbles.
- Central heating inhibitor to add back on refill (protects against corrosion and sludge).
- PTFE tape and possibly new fibre or rubber washers if you are undoing fittings.
- A bucket for the last of the dirty water, and gloves, because system water is often black and stains.
One honest note on the water itself: central heating water is not clean. It is typically dark grey to black with corrosion inhibitor and sludge, it smells, and it stains grout, paving and clothing. Plan your hose route so it discharges somewhere that can take dark water, and lay towels along the run in case of a leak.
Step-by-step: how to drain down the system
Work through these in order. Do not skip the cooling-down step, and do not rush the refill at the end.
- Turn off the boiler and let the system cool. Switch the boiler off at its controls and, ideally, at the fused spur. Then wait. Draining hot water is dangerous and pointless, because you risk scalding and the water expands. Give a system that has been running at least an hour, longer for a large one, until radiators are cool to the hand.
- Cut off the water supply to the system. On a sealed system, make sure the filling loop is closed so no fresh water can enter. On an open-vented system, stop the feed-and-expansion tank refilling: either turn off its supply or tie the float valve up to a batten across the tank so it stays shut.
- Turn off the gas supply to the boiler if you are working near it. Any work on the gas side of the appliance itself is Gas Safe territory and not part of a drain down, but isolating the boiler is sensible before you empty it.
- Find the drain-off point. This is a small brass valve, usually near the lowest point of the system: at the bottom of a downstairs radiator, on the pipework near the boiler, or where the pipes run lowest under a suspended floor. It has a square spindle and often a hose-tail nozzle. If there is more than one, use the lowest one so gravity empties as much as possible.
- Attach the hose and secure it. Push the hose firmly onto the drain-off nozzle and clamp it with a jubilee clip. A hose that pops off under the weight of water is the classic way to flood a room. Run the other end to an outside drain, at a lower level than the drain-off point so the water flows downhill.
- Open the drain-off valve. Use the spanner to turn the square spindle. Water will start to flow through the hose. It will be slow at first because the system is still sealed at the top.
- Open the bleed valves to let air in. This is the step people forget. Water will not drain freely unless air can get in behind it. Start by opening the bleed valve on the highest radiator in the house, then work downwards, opening each radiator's bleed valve in turn. As you open them the flow at the hose will speed up noticeably. On an open-vented system you can also open valves progressively from the top down.
- Let it drain fully. Give it time. A whole-house system holds a surprising amount of water. Wait until the flow at the hose stops completely. Opening the bleed valves at the lowest radiators last helps clear the final water sitting in the bottom pipes.
- Do your work. With the system empty you can now remove the radiator, remake the joint, or change the valve. Keep towels handy, because even a drained system holds residual water in low pipe runs and radiators that tips out when you undo a fitting. Have a bucket under any joint you open.
Refilling, re-pressurising and bleeding the air out
This is the half of the job that separates a clean result from a week of cold radiators and airlocks. Take it slowly.
- Close everything you opened. Close all the radiator bleed valves. Close the drain-off valve firmly, then remove the hose (there will be a last dribble, so have a towel ready). Double-check any joint or valve you worked on is fully tightened.
- Add inhibitor. Fresh water plus air is what corrodes a system, so replacing the corrosion inhibitor is not optional if you want the system to last. On many systems inhibitor is added through a radiator (via the bleed point or a valve) or through a dosing point before you refill. Follow the product's dosing for your system size.
- Refill the system slowly. On a sealed system, open the filling loop valves gently and watch the pressure gauge rise. Fill to around 1.0 to 1.5 bar cold, no higher. On an open-vented system, release the float valve in the loft tank and let it fill by gravity. Filling slowly gives air a chance to gather at the top rather than becoming trapped as pockets.
- Bleed the air out as it fills. Once water is in, go round the radiators from the lowest to the highest and bleed each one: open the bleed valve with the key until water, not air, comes out, then close it. On a sealed system the pressure will drop as you bleed, so top up with the filling loop to keep it in range.
- Check your pressure and top up. After bleeding, the sealed-system gauge should settle around 1.0 to 1.5 bar cold. If it has dropped, top up. Then close the filling loop fully and, if it is a removable type, detach it.
- Fire the boiler and warm through. Turn the boiler and heating back on and let the system come up to temperature. Feel each radiator, top and bottom. Cold spots at the top mean trapped air still to bleed; cold at the bottom can mean sludge. Bleed again once warm if needed, and recheck pressure once the system has cooled.
- Check every joint you touched, twice. Watch the joints you remade as the system heats, expands and pressurises, because that is when a weak joint will weep. Come back an hour later and check again. A joint that is dry hot and dry cold is a joint you can trust.
Safety, and the things that go wrong
None of this is high-risk in the way gas work is, but there are a few genuine hazards and a longer list of common mistakes.
Safety points worth taking seriously
- Never drain a hot system. Scalding is the real risk. Let it cool properly.
- Keep water away from electrics. The boiler, pump, thermostats and any nearby sockets do not mix with a hose that pops off. Isolate the boiler electrically and protect the area.
- Leave gas alone. Anything on the gas side of the boiler, the gas valve, the burner, the flue, must be done by a Gas Safe registered engineer. A drain down never requires you to open the gas side, so if a job seems to, stop.
- Mind old fittings. On older London systems, undoing a valve that has not moved in twenty years can shear it or crack a spur off a radiator. If a fitting feels seized, do not force it.
Common mistakes people make
The consensus you will find on DIY forums such as r/DIYUK and DIYnot is refreshingly consistent, and it lines up with what causes the callouts we see. The recurring themes are worth listing plainly:
- Not opening the bleed valves, so nothing drains. People open the drain-off, get a trickle, and assume the system is nearly empty when in fact it is airlocked. Air has to get in at the top for water to come out at the bottom.
- The hose blowing off the drain-off nozzle. No jubilee clip, and the weight of moving water pushes the hose off and floods the room. Clamp it.
- Refilling too fast and trapping air. A quick refill locks air into radiators and high pipe runs, leaving cold radiators and a system that bangs. Fill slowly and bleed as you go.
- Forgetting the inhibitor. Fresh water without inhibitor accelerates internal corrosion and sludge. It is the single most common long-term mistake, and its cost shows up years later as cold spots and pinhole leaks.
- Over-pressurising a sealed system. Filling well above 1.5 bar cold stresses the system and can trip the pressure relief valve, which then weeps. Watch the gauge.
- Disturbing tired valves and joints. Draining down sometimes reveals that an old lockshield or a corroded joint was the only thing not leaking. This is not really your mistake, but it is why an old system can turn a simple job into a bigger one.
- Not checking the drain-off valve reseals. These small brass valves can fail to close fully, especially if grit passes through them. Confirm it is dry before you walk away.
Typical costs if you bring in a professional
If you would rather not do this yourself, or the job turns out to be bigger than expected, it helps to know roughly what the work is worth. The figures below are typical UK trade cost-guide ranges, not a quote, and London tends to sit at the upper end. Your actual price depends on system size, access, and what is found once the system is open.
| Job | Typical UK trade cost-guide range | Notes |
|---|---|---|
| Drain down and refill a system | Around 80 to 180 pounds | Varies with system size and access |
| Remove and refit a single radiator | Around 90 to 200 pounds | Often done by isolating, no full drain needed |
| Replace a radiator valve | Around 100 to 200 pounds per valve | More if pipework is awkward |
| Repair a pipework leak | Around 120 to 300 pounds | Depends heavily on access and cause |
| Add fresh inhibitor | Around 60 to 120 pounds | Often bundled with other work |
We think it is fairer to talk about ranges than to promise a single headline number, because the honest truth is that heating jobs vary. What we can commit to is how we handle it: an honest arrival window rather than a vague all-day wait, and a price agreed with you before we travel, so there are no surprises when we arrive.
When to leave it to a professional
Plenty of homeowners can drain down and refill a straightforward sealed system to take a radiator off for decorating. That is a reasonable weekend job. But there are clear points where calling a professional is the sensible choice rather than an admission of defeat.
- Anything involving the gas side of the boiler. This must be a Gas Safe registered engineer, without exception.
- Old or seized fittings. If valves will not budge, or the pipework is corroded, forcing it risks turning a small job into a flooded floor and an emergency.
- Persistent airlocks or cold radiators after refilling. If you have bled and bled and radiators stay cold, there may be a pump, valve or airlock issue that needs proper diagnosis.
- A leak you cannot find or reach. Hidden leaks under floors or in walls are worth tracing properly before you drain anything.
- You are simply not confident. Water and heating systems are unforgiving of half-finished jobs. There is no shame in getting it done right.
If any of that describes your situation, or a job you started has become an emergency with water where it should not be, our emergency plumber in London service can help, with an honest arrival window and a price agreed before we set off. And if the underlying problem is a mystery leak rather than a job you have chosen to do, start with central heating leak detection in London so you are not draining a system that never needed emptying.
Done carefully, a drain down is a controlled, methodical job: cool it down, isolate it, drain from the lowest point with air let in at the top, do the work, then refill slowly, re-pressurise, add inhibitor and bleed the air back out. Rush the refill and you will chase airlocks for days. Take your time, check your joints twice, and you will have a system that runs quietly and lasts.
Frequently asked questions
Do I need to drain the whole system just to remove one radiator?
Usually not. If the radiator has a valve at each end, you can close both, undo the unions and lift it off with only the water inside that radiator to catch in a tray. A full drain down is only needed when the radiator cannot be isolated, or when you are working on the pipework feeding it. Isolating a single radiator is quicker, cleaner and avoids introducing fresh water to the whole system.
How long does it take to drain down a central heating system?
For a typical home, expect the draining itself to take roughly 20 to 40 minutes once the hose is connected and the bleed valves are open, though a large system holds more water and takes longer. Add cooling-down time beforehand and the refill, re-pressurise and bleed afterwards, and the whole job is usually a couple of hours. Rushing any stage, especially the refill, tends to cost you more time later chasing airlocks.
Why won't my system drain even though the drain-off valve is open?
Almost always because no air is getting in at the top. Water cannot flow out of the bottom unless air replaces it, so the system airlocks and you get only a trickle. Open the bleed valve on the highest radiator first, then work downwards, and you should hear and see the flow speed up. Also check the hose has not kinked and the drain-off route runs downhill to the outlet.
Do I have to add inhibitor after draining down?
Yes, if you want the system to last. Draining introduces fresh, oxygenated water, which accelerates internal corrosion and sludge build-up. Corrosion inhibitor protects the metal and keeps the system clean, so it should be replaced on every refill. Skipping it is the most common long-term mistake, and the damage shows up years later as cold spots, noisy radiators and pinhole leaks that are far more expensive to fix than a bottle of inhibitor.
What pressure should a sealed system be after refilling?
Around 1.0 to 1.5 bar when the system is cold is the usual target, but check your boiler's own guidance as some differ. Fill slowly using the filling loop and watch the gauge, bleeding radiators as you go, which will make the pressure drop and need topping up. Do not over-fill above about 1.5 bar cold, as excess pressure can trip the pressure relief valve and leave it weeping afterwards.
Is draining down a system something I should just leave to a professional?
A straightforward sealed system, drained to take a radiator off for decorating, is a reasonable DIY job if you are careful and methodical. Call a professional when the boiler's gas side is involved, which is Gas Safe work by law, when fittings are old or seized, when radiators stay cold after repeated bleeding, or when there is a hidden leak to trace first. If you are not confident, getting it done properly is cheaper than a flooded floor.