An outside tap that drips, weeps at the wall or splits after a frost is one of the most common plumbing jobs in London homes. Here is what actually causes it, how to fix a drip yourself, and when the leak is a warning about the pipe inside your wall.
An outside tap is one of those fittings nobody thinks about until it starts dripping, weeping at the wall or, after a hard frost, splits open the moment you turn it on in spring. Because it lives outside, exposed to the weather and often plumbed through a solid wall, it fails in ways an indoor tap never does. The good news is that most outside tap leaks come down to a short list of causes, and several of them are genuinely fixable with a spanner and a couple of cheap parts. The important part is telling those apart from the leaks that are actually warning you about the pipe hidden inside your wall.
This guide walks through where garden taps leak, how to fix a simple drip, why they burst in cold weather and how to protect yours before winter. Throughout, we have tried to be honest about what is a sensible DIY job and what is the point where you should stop and call a London emergency plumber rather than make things worse.
Where an outside tap actually leaks
The phrase "my outside tap is leaking" covers at least five different faults, and the fix for each one is different. Before you touch a spanner, work out where the water is actually coming from, because that single observation usually tells you the cause.
1. A drip from the spout or nozzle
Water dripping from the end of the tap when it is turned fully off almost always means a worn washer (also called a jumper washer) inside the tap. The washer is a small rubber or fibre disc that presses down onto a seat to stop the flow. Over years of use, and especially after being frozen, it hardens, splits or wears unevenly and no longer seals. This is the classic outside tap drip and, on a traditional bib tap, it is the easiest fault to fix.
2. Water weeping from the spindle or handle
If water seeps out from around the handle or spindle when the tap is turned on, the problem is usually the gland packing or the O-ring on the spindle rather than the washer. The mechanism that seals the moving shaft has perished. Tightening the gland nut a fraction, or replacing the O-ring, normally cures it.
3. A leak where the tap meets the wall
This is the one to take seriously. A leak at the threaded connection behind the tap, or from the wall plate, can be a simple case of a joint that needs re-sealing with PTFE tape. But it can also mean the pipe running through the wall has a fault, or that a fitting inside the wall or inside the house has been damaged, often by frost. Water appearing at the wall is sometimes water that has actually leaked further back and is only emerging here. We cover this properly further down, because it is the failure most likely to cause real damage.
4. A split in the tap body or pipe after cold weather
If the tap was fine in autumn and then leaks, sprays or floods the first time you use it in spring, suspect a freeze split. Water expands as it freezes and can crack the brass body of the tap or, more often, split the copper pipe feeding it. The crack may be invisible until water is under pressure again. This is the single most common cause of outside tap floods in the UK.
5. A failed check valve or isolation valve
Many outside taps installed under current water regulations include a double check valve to stop garden water being drawn back into the drinking supply. If that valve fails it can weep or cause odd dripping. Separately, most outside taps are fed from an internal isolation (service) valve, usually just inside the wall. If that valve is passing or its washer has failed, you can get a persistent leak that no amount of work on the outside tap will fix.
Symptom, cause and fix at a glance
| Symptom | Most likely cause | Typical fix |
|---|---|---|
| Drips from the spout when fully closed | Worn or hardened washer / jumper | Replace the washer |
| Weeps around the handle when running | Perished gland packing or spindle O-ring | Tighten gland nut or renew O-ring |
| Weeps at the threaded wall connection | Joint seal failed, or pipe fault behind the wall | Re-seal with PTFE; investigate if it persists |
| Sprays or floods first use after winter | Frost split in tap body or feed pipe | Replace tap and/or repair pipe section |
| Constant drip that ignores tap work | Passing isolation valve or failed check valve | Replace valve or check valve cartridge |
| Damp patch on internal wall near the tap | Leak on the pipe inside the wall | Isolate supply and call a plumber |
How to fix a dripping outside tap
If your fault is a simple drip from the spout of a traditional bib tap, this is a reasonable job to attempt yourself. The whole thing usually costs a few pounds in parts. Work methodically and do not skip the first step, because turning the water off is the difference between a tidy repair and a soaking.
- Find and close the isolation valve that feeds the outside tap. It is usually on the pipe just inside the wall, behind or near where the tap comes through. Turn the small screw slot a quarter turn so it sits across the pipe. If you cannot find one, turn off your internal stopcock instead.
- Open the outside tap fully to release any pressure and let the remaining water drain out. Leave it open.
- Hold the body of the tap steady with one spanner and undo the large headgear nut (the hexagon below the handle) with another. Using two spanners stops you twisting the whole tap and straining the pipe behind the wall.
- Lift out the headgear and handle assembly. On the bottom you will find the washer, held by a small nut or simply pushed onto a button.
- Remove the old washer. Take it with you to buy an exact replacement, or fit a like-for-like from a tap washer kit. While it is apart, check the O-ring on the spindle and renew it too if it looks flattened or perished.
- Clean the brass seat the washer presses onto. If it feels rough or pitted, that roughness will chew through a new washer quickly; a seat re-cutting tool sorts it, or it may be a sign the tap is due for replacement.
- Reassemble in reverse, wrapping fresh PTFE tape clockwise around any threads you separated. Do not overtighten.
- Close the tap, reopen the isolation valve slowly, then test. Watch the wall connection as well as the spout for the first few minutes.
If, after a new washer, the tap still drips, the seat is likely damaged, or the fault was never the washer to begin with. At that point replacing the whole tap is usually more sensible than chasing it. And if the leak is at the wall, from a split, or from the valve inside, this DIY route will not solve it.
What plumbing forums actually agree on
Read through the DIY plumbing communities such as r/DIYUK and DIYnot and a fairly consistent view emerges on outside taps. A few themes come up again and again, and they line up with what we see on jobs.
The first is that a dripping washer on a standard bib tap is widely considered a beginner-friendly fix, and people are generally encouraged to try it. The second is a strong, repeated warning: do not put a spanner on the tap without holding the body still, because twisting the fitting can crack the joint or the pipe inside the wall and turn a two pound washer job into a wall-opening repair. The third recurring point is that many older outside taps have no isolation valve and no frost protection at all, which is why so many split, and that fitting a drain-down or a frost-proof arrangement is the real long-term answer rather than repairing the same tap every spring. Finally, the consensus on any leak appearing at or inside the wall is consistent and cautious: that is not a washer, treat it as a pipe problem until proven otherwise. We would not argue with any of that.
Why outside taps burst in cold weather
Water is unusual: it expands by roughly a tenth of its volume as it turns to ice. An outside tap and the short run of pipe feeding it are the most exposed plumbing in the house, often sitting in still air against a cold wall with no lagging. When a hard frost hits, any water trapped in that section can freeze. The expanding ice has nowhere to go, so pressure builds until something gives, usually the copper pipe or the brass tap body cracks.
The cruel part is that you rarely notice at the moment of freezing. The split stays sealed by the ice plug. It is only when everything thaws, or when you next open the tap in spring, that water finds the crack and pours out, sometimes inside the wall or under the floor where the feed pipe runs. This delayed failure is exactly why a tap that "worked perfectly last year" can flood on its first use of the season. The same physics is behind burst pipes elsewhere in an unheated home, and the prevention overlaps heavily with our guide on how to prevent and thaw frozen pipes.
How to protect an outside tap before winter
Protecting an outside tap is cheap, quick and far less hassle than dealing with a burst. The single most effective step is to drain the tap down so there is no water left in the exposed section to freeze.
- In autumn, before the first frosts, find the isolation valve that feeds the outside tap and close it.
- Open the outside tap fully and leave it open over winter. With the supply isolated, any water in the exposed pipe and tap drains out, so there is nothing left to expand and crack the fitting. Leaving the tap open also gives any small amount of residual water room to expand harmlessly.
- Fit an insulated outside tap cover over the tap, or wrap the tap and the exposed pipe with proper pipe lagging. A cover on its own helps, but draining down is what actually removes the risk.
- If your tap has no isolation valve, this is the ideal time to have one fitted. It makes every future winter, and every future washer change, far easier.
Come spring, close the tap, reopen the isolation valve slowly, and watch the tap and the wall for the first few minutes of use. That is the moment a hidden frost split reveals itself, and catching it while you are standing there is a great deal better than finding it via a damp ceiling.
When a leak at the wall means a pipe problem inside
Here is the distinction that matters most. A drip from the spout is a tap problem. A leak that appears at the wall, keeps going when the tap is shut, or shows up as a damp patch, staining or blown plaster on the inside face of that same wall, is very likely a pipe problem, not a tap problem.
The feed pipe usually runs through the masonry and connects to internal pipework. If that pipe has a frost split, a corroded joint or a fitting that has worked loose, water can travel along the pipe and emerge at the wall plate outside, or soak into the wall and appear inside. Because the source is hidden, the leak is easy to underestimate. Left alone it can saturate brickwork, ruin plaster and, on a shared or party wall in a London terrace or flat, become your neighbour's problem too.
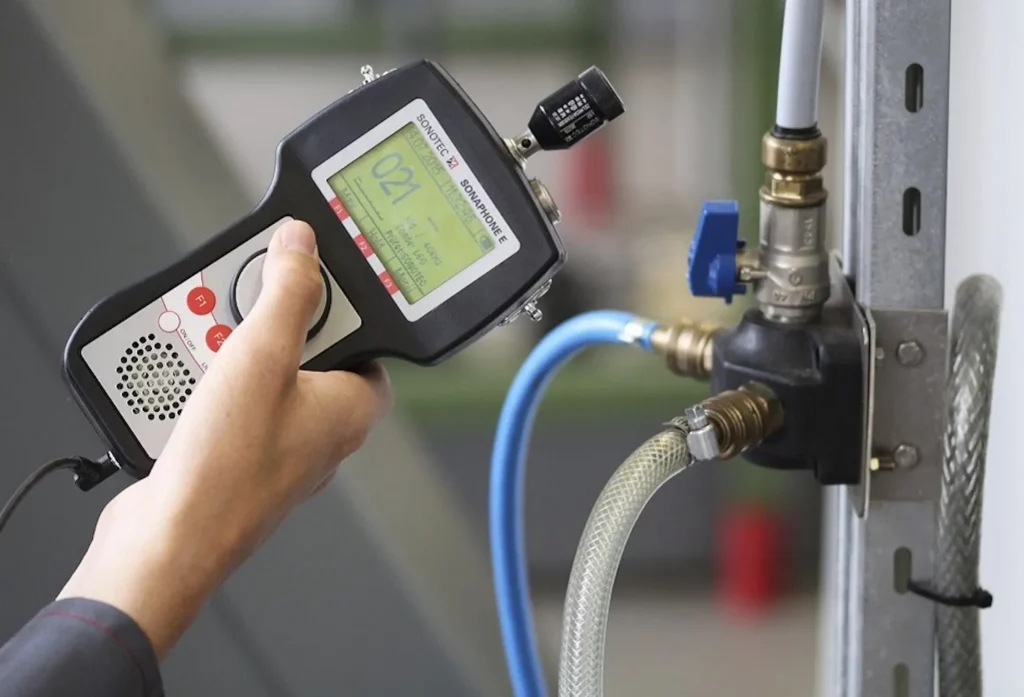
Signs that point inward rather than at the tap include water at the wall that does not stop when the tap is fully closed, a hissing or trickling sound from inside the wall, damp or cold patches on the internal plaster near the tap, and a water meter that keeps ticking over when every tap in the house is off. If you see any of those, close the isolation valve or the main stopcock straight away and treat it as a concealed leak. This is squarely the territory of professional water leak repair in London, where tracing the exact point without demolishing half a wall is the whole skill.
When to call a plumber
Replacing a washer, draining a tap for winter or re-sealing a straightforward joint are all fair game for a confident homeowner. It is worth calling a professional when the tap or pipe has split from frost, when the leak is at or inside the wall, when there is no isolation valve and you would be working on live pipework through masonry, when the water will not fully shut off, or when water is actively getting into the building. A burst outside feed on a cold morning can flood quickly, and at that point it is an emergency rather than a weekend job.
When you do call us, we keep it honest. We give you a realistic arrival window rather than a promise we cannot keep, and the price is agreed before we travel, so there are no surprises once we are at your door. Whether it is a single tap that needs swapping or a concealed leak behind the wall that needs tracing, the aim is to sort it properly the first time and leave you with a tap that survives the next winter.
Frequently asked questions
Why does my outside tap only leak in spring after being fine all winter?
This is the classic sign of a frost split. Water trapped in the tap or feed pipe froze during winter and cracked the brass or copper, but the ice plug kept it sealed. As soon as it thaws and you turn the tap on under pressure, water finds the crack and leaks or sprays. The tap or the pipe section usually needs replacing rather than repairing.
Can I fix a dripping outside tap myself?
If it drips from the spout when fully closed, yes, this is usually a worn washer and a reasonable DIY job. Isolate the supply first, hold the tap body still with a second spanner while you undo the headgear so you do not strain the pipe in the wall, replace the washer and O-ring, and re-seal threads with PTFE tape. If the leak is at the wall, from a split, or does not stop when the tap is shut, that is not a washer and should be looked at by a plumber.
How do I stop my outside tap freezing and bursting?
Before the first frosts, close the internal isolation valve that feeds the tap, then open the outside tap and leave it open through winter so the exposed section drains and has no water left to freeze. Add an insulated tap cover or pipe lagging for extra protection. Draining down is the step that actually removes the risk; insulation alone only slows freezing.
There is a damp patch on the inside wall near my outside tap. What does that mean?
Damp, staining or blown plaster on the internal face of the wall near an outside tap usually points to a leak on the pipe running through the wall rather than the tap itself, often a frost split or a failed joint. Close the isolation valve or main stopcock and treat it as a concealed leak. Tracing and repairing it is a job for a professional water leak specialist before it damages the wall further.
My outside tap keeps dripping even after I changed the washer. Why?
Usually the brass seat the washer presses onto is pitted or rough, so it chews through a new washer and never seals. Re-cutting the seat can help, but on an old tap it is often more sensible to replace the whole tap. A constant drip that ignores tap work altogether can also be a passing isolation valve or a failed double check valve upstream, which no amount of washer changing will cure.
How much does it cost to repair or replace an outside tap in London?
As a rough guide, typical UK trade cost-guide ranges put a simple washer or O-ring replacement at the lower end of a standard call-out, while swapping a whole bib tap, fitting an isolation valve or repairing a frost-split feed pipe costs more depending on access and how much pipework is involved. A concealed leak inside the wall is priced by the tracing and repair work required. We agree the price with you before we travel, so you know the figure up front.